T110 Rebuild

This blog is about the rebuild of my Dads Triumph T110 after being in "boxes" for 39 years!


Showing posts with label 650cc. engine. Show all posts

Wednesday, December 28, 2011

Day 3 - Engine

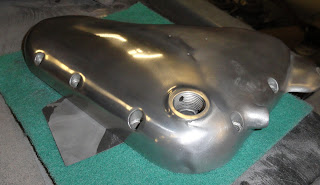
More time was spent on sanding the covers, taking the grit down and finer to 360 then 600 we also used 2 scouring type pads to smooth even more. The 600 grit was water flatted. After flating, polishing could begin - we used the large poilishing wheel with rouge and the results were quite spectacular. While polishing the covers heat up quite extensively.

Halfway through 600 grit


Trying out the polishing wheel


Half and Half

Straight after polishing
Many of the engine studs needed to be re-plated, so Craig had a job working on these, they were first pickled in acid to get rid of rust and coating, then they were vapour blasted to get rid of dirt buildup in the threads, then it gets wired and submerged in the electro-plater for the required amount of time then it gets neutralised and they come out looking like new.

The results - post plating
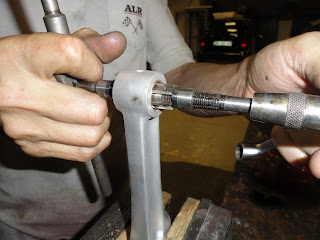
For the conrods the test machining process of the previous day worked very well so Roger repeated the process on the actual 2 con. rods we are going to use. The tops were flatted to take them down a size then they were milled to take away the oval, then checked with marking ink to check surface fit and edges chamfered to get this fit precise - quite a precise and timely process.


Once conrods were resized the rough edges on the shafts were filed to smooth them out and reduce possible weakness in the future. They were then sanded to smooth the filing marks, bead blasted and then vapour blasted for a brand new look.


The top brass bushes then needed to be pressed in which was done with heating the con rod end with a flame and clamping down the bush to press it in. Once they were pressed in the bushes were reamed so there was a good fit with the gudgeon pins.


In the engine casing the cam shaft bushes neede to be removed , this was done by threading a large tap into them, heating the casing with a flame and drifting the bushes out.


My nephew Michael working on metal bead blasting the head which is cast iron, but someone liked the idea of it being alluminium so drenched it in some kind of silver paint. Over the years all the paint has gathered in the fins and has proved quite difficult to get out. In the end we resorted to scraping it out with a marking pick.


The engine gears were vapour blasted to get them back to new and then sprayed with some lubricant so as not to attract rust.


We also started working on getting the casings true and even on the mounting edges so as to ensure a good seal between casings. We used 80 or 100 grit sand paper roll glued to a marble base, and then sanded.

Tuesday, December 27, 2011

Day 2 - Engine

Today more time was spent on sanding out the engine covers, to remove blemish using 100 and 180 grit. Some covers required the use of a rough file and dremel to work on the deep gouges. 
Areas where more work was needed have been marked up.
The flat faces were also sanded on a flat block to level the mounting edges. 
The original connecting rods did not use shells, so these need to be milled so as to fit onto the newly polished journals. Quite some time was involved in truing and setting up the milling machine, there after a spare con. rod was used as a tester to get the process correct - it was found that the edges needed to be chamfered quite a bit after the milling had been done to unsure the correct seating of the con. rods.


Main engine casings were also vapour blasted.

Monday, December 26, 2011

Holiday Engine build: Day 1

So we have had the opportunity to travel up to my big brothers place to work on the engine during the holidays. So yesterday other than being Christmas was also day 1 of getting some work done.


Roger and his Machine!
We managed to vapour blast the Ali. Covers to clean them up a bit - the vapour blast machine is one Roger has built himself and works really well. 
Cover after being blasted - really cleans up well and removes all the dirt and grime.


Comparison between the 2 rocker covers - left side blasted - right side as it was.
Cover prior to being blasted.
Once vapour blasting was done it was time to start sanding the scratches/imperfections out with some 100 grit sand paper.
Some "elbow grease"


My nephew Michael helping with his own brand of "muscle power"
Side cover after some hours of sanding - there were deep gouges to be removed.


While this was being done Roger dismantled the crank to clean it out as well as polishing up the journals. 
Camshaft after vapour blasting.

Dismantled.
All polished up, vapour blasted, and sprayed with oil for protection.

The connector rods were also vapour blasted and came out quite well.


Wednesday, July 20, 2011

Engine sorting out - the beginning!

My brother Roger has been in town and he was able to help me go through the multiple of engine bits we had to find the best options to make up a complete engine. This is great as now I have a place to start working from in terms of machining getting some small missing parts etc. In all there were various parts from 3 different engines. we made sure we kept the casing that has the engine numbers which match the frame numbers, so a matching set! Here are some pics.