Stumbled upon this website a week or so ago. Paul has got a great history and write up of his dad's T110. I see he has recently acquired his own to restore and should be an interesting read in the future.
http://www.go-faster.com/TriumphT110.html

Saturday, January 14, 2012
Sunday, January 8, 2012
Flying Tigers - Two Triumph Tiger 110's - Classic Bike Guide Magazine
Flying Tigers - Two Triumph Tiger 110's - Classic Bike Guide Magazine
The January issue of Classic bike magazine has an interesting comparison between the first and last Triumph T110 produced - there is a link to the interview aswell.
Saturday, January 7, 2012
Finally - Engine
So after 9 days of hard work and 4 months of long distance planning and ordering parts from all over the world this was the final result. Here is a before and after pic.
 |
| Before & After! |
And spending 9 days working and learning from your big brother = priceless :-)
 |
| Thanks Boet! |
Day 9 - Engine
So we got up early this morning to go look for bolts, the first shop was still closed but the second was fortunately open and had just what we were looking for. Here is a comparison of the old and new bolts.


Along came the oil filter with cover plate and 2 gaskets, which were greased before installing.


Next the timing gears were positioned.

Not forgetting these two tiny case screws which help secure the two casing halves together.

Before the barrel could be positioned the gasket was greased and put on all the studs had been positioned with loctite prior to this. The pistons were also in place with the new gudgeon pins.


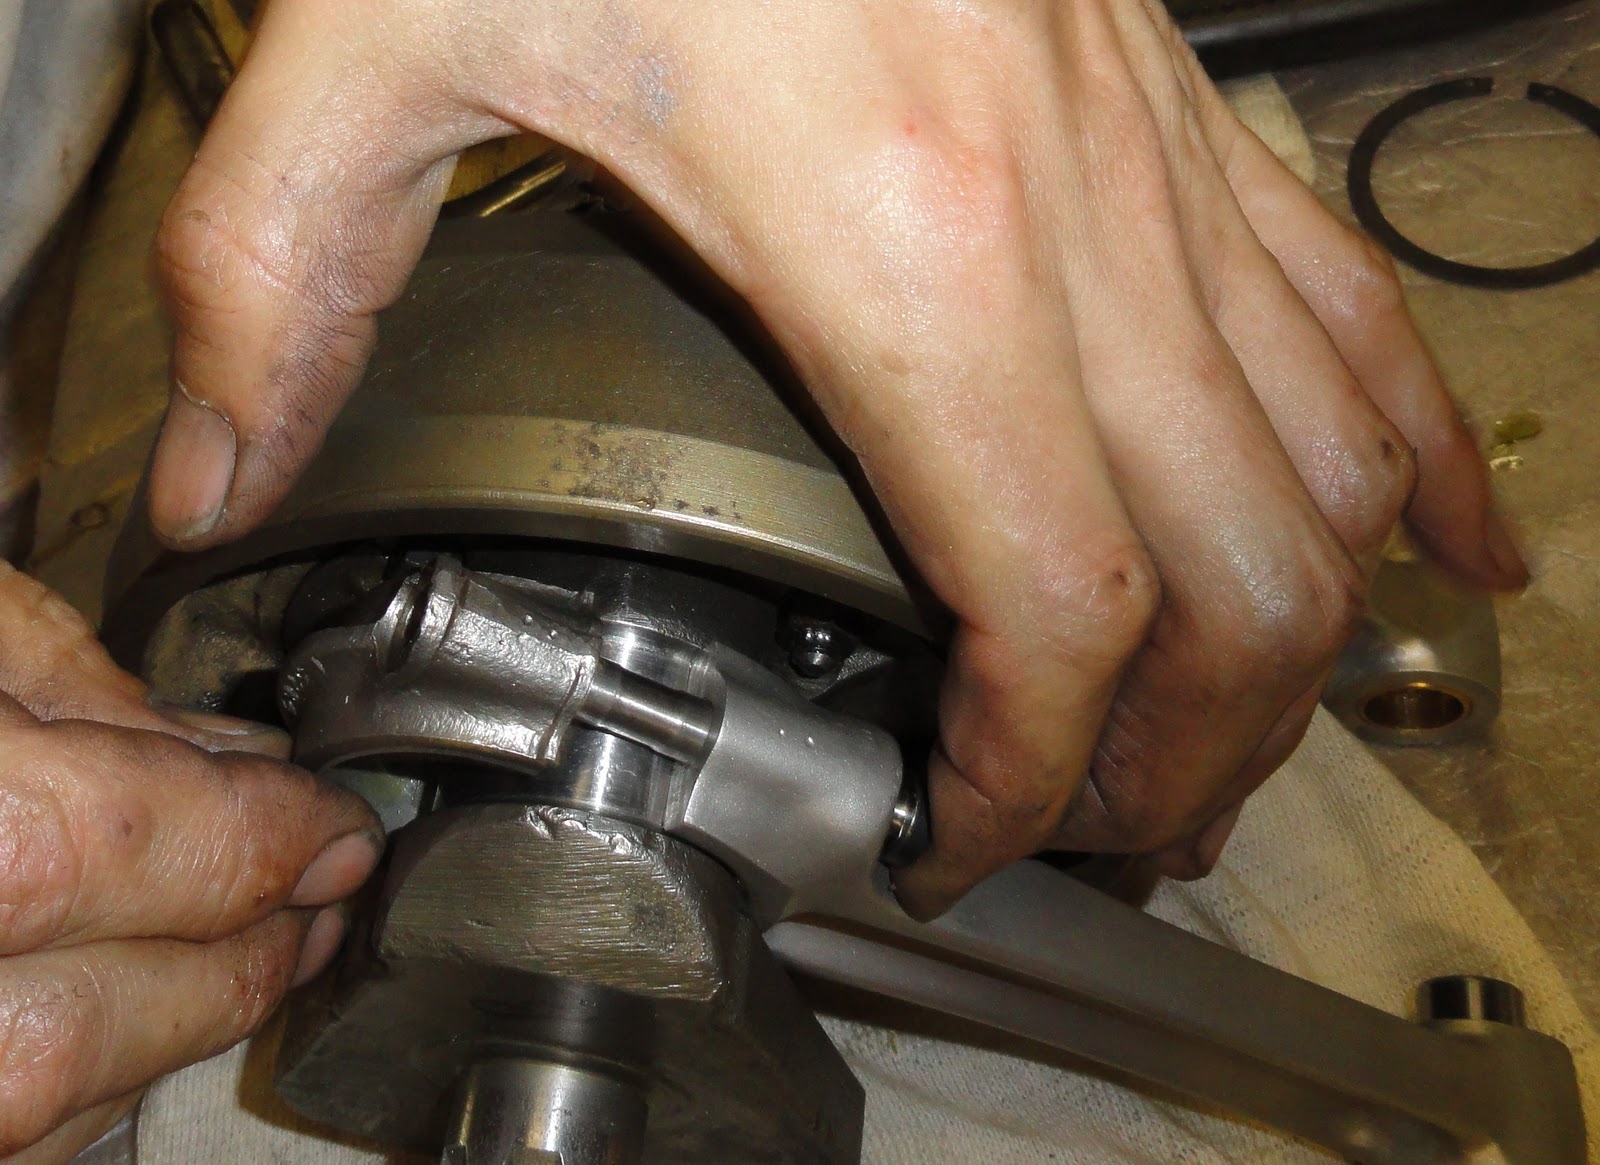
We were then ready to fit the barrel - at first we tried assembling the pistons into the barrel by squeezing the pistons as the manual recommends, but weren't to happy with this. So rather removed the gudgeon pins and pistons and rather used a Piston Ring Compressor to position the pistons in the barrel first then lowered the barrel over the connection rods and replaced the gudgeon pins. Much easier.
Next up were the cam followers, push rods, pushrod tubes and the new copper head gasket (this was new so no need to anneal it).


Now for rocker box gaskets - again greased and placed in position, then the rocker boxes could be bolted down and where needed on the assembly bolts were torqued correctly.


 |
| Old and pitted bolt left - new one right. |
The assembly could now begin.
 |
| The pieces |
 |
| All together - and torqued |
Next would be fitting the connection rods and bolting them up.


Then the sub assembly could be placed in the casing along with the camshafts in there new bushes.


 |
| It will fit! |


Then the oil feeder and the new herring-bone pattern pipes.
 |
| A gentle persuasive tap! |

Not forgetting these two tiny case screws which help secure the two casing halves together.


 |
| Rings rotated 120 degrees from each other. |
 |
| First attempt - not working to well. |
 |
| Ring clamp + a little blood ;-) |
 |
| Gungeon pins replaced. |


 |
| Copper head gasket in place. |
Finally the head was ready to be positioned.

 |
| Starting to look good. |


 |
| Rockers in position. |
At this time some work was done on checking out the timing degrees and changing a gear position. Some gauges were employed to help pick up the precise inlet and exhaust positions.

 Oh and don't forget the new oil pump!


Unfortunately the gearbox was not functioning 100% - the one gear was dragging slightly in neutral and was left at the workshop for a bit more TLC, and couldn't be brought home yet.

 |
| Gauges and gadgets. |


Clutch was assembled with the new clutch rubbers - still need some new springs - the old ones are a bit tired and misshapen. New clutch plates, both steel and cork were inserted.


Unfortunately the gearbox was not functioning 100% - the one gear was dragging slightly in neutral and was left at the workshop for a bit more TLC, and couldn't be brought home yet.
Day 8 - Engine
So it is new year and the rebuild is a bit on hold - we need to wait to for the shops to re-open so we can get hold of some replacement high tensile bolts for the crankshaft.
In the meantime some more bolt and nut plating was done. Here is an interesting comparison of some bolts, firstly after they have pickled in some acid for awhile (this is done to remove old zinc plating as well as any existing rust), then once they have been vapour blasted and finally after plating.
There was also some time to work on rebuilding the starter pivot and a new bush was needed to ensure a good fit - Roger made quick work of this on his lathe.


In the meantime some more bolt and nut plating was done. Here is an interesting comparison of some bolts, firstly after they have pickled in some acid for awhile (this is done to remove old zinc plating as well as any existing rust), then once they have been vapour blasted and finally after plating.
 |
| After pickling |
 |
| After vapour blasting |
 |
| After plating |
Similar nut comparison between pickling and vapour blasting.
 |
| Pickling |
 |
| Vapour blasting |


 |
| Master at work |
Sunday, January 1, 2012
Day 7 - Engine
A small black pipe was added to the inside of the oil release valve.
 A new breather pipe had to be cut bent and fitted to the inside cover.


The badge was put onto the side cover, it has 3 small brass rivets and needed to be tapped in carefully not to damage anything.


The valves were then installed in the head, the bottom cup were put in then the spring then the top cup washer then a valve spring compressor was used to compress the spring down and the 2 keys were inserted.


The whole way through where ever there are studs the holes were tapped and cleaned to make sure of a good fit for the studs. Studs were fitted with loctite.
The exhaust outlet manifold could then be fitted.
The piston rings were checked to see if the fitted the minimum clearance value which they did.

The oil drain pipe was reinstalled in the crankcase cover, and the filter fitting was checked in relation the the pipe and minor adjustments were made to ensure the right alignment.


The welsh plug was sealed and fitted in the end of the gearbox casing then the re-assembly of the gearbox could continue.


We had to figure out which gears went were and the positioning of the camplate adjuster, it was quite tricky get the hole bunch of gears back in the box together but eventually worked out. The starter pin had to be rebuilt a bit as it had suffered some abuse in the past.


The badge was put onto the side cover, it has 3 small brass rivets and needed to be tapped in carefully not to damage anything.
 |
| New badge "T110" |
 |
| Insulation tape protection! |
 |
| Rogers purpose made "badge pin punch" |
The rocker boxes needed to be assembled, which proved quite a challenge to get the process correct - almost like a puzzle getting the the sprung washers, washers and pin in the correct sequence. But in the end they looked great.
 |
| Another purpose made tool - chamfered interior edge to protect o-ring seal on rocker spindle. |

 |
| Minor "surgery" |

The valves were then installed in the head, the bottom cup were put in then the spring then the top cup washer then a valve spring compressor was used to compress the spring down and the 2 keys were inserted.


The whole way through where ever there are studs the holes were tapped and cleaned to make sure of a good fit for the studs. Studs were fitted with loctite.
The exhaust outlet manifold could then be fitted.
The piston rings were checked to see if the fitted the minimum clearance value which they did.

The oil drain pipe was reinstalled in the crankcase cover, and the filter fitting was checked in relation the the pipe and minor adjustments were made to ensure the right alignment.


The welsh plug was sealed and fitted in the end of the gearbox casing then the re-assembly of the gearbox could continue.


We had to figure out which gears went were and the positioning of the camplate adjuster, it was quite tricky get the hole bunch of gears back in the box together but eventually worked out. The starter pin had to be rebuilt a bit as it had suffered some abuse in the past.


Subscribe to:
Posts (Atom)